
How I Plan Low-Friction Travel Itineraries
I’ve definitely had trips where I was already out for the day, tired and trying to enjoy the place, only to realize I still had too many basic decisions to make.
Where should I go next? Is this museum even open today? Should I walk or take transit? Did I just forget about that place I wanted to go??
Sometimes this is just annoying. Other times, it actually affects the day. If I realize too late that a place is farther away than I thought, closed that day, or needed more planning ahead, I might not be able to fit it in anymore. Or I might still fit it in, but only by rushing, backtracking, or spending more energy than I wanted to.
That’s the kind of friction I’m trying to avoid when I plan itineraries — not to have every minute of the trip controlled, but to have fewer decisions pulling me away from actually experiencing the place.
This is one piece of my broader low-friction travel approach of planning enough ahead of time so that the trip feels easier once I’m actually there. Here’s the basic process I use.
My basic low-friction itinerary planning process
1. Make a messy wishlist
I usually start by researching broadly: major sights, neighborhoods, places to eat, viewpoints, walks, museums, markets, and anything else that sounds interesting for that place. At this stage, I’m not trying to make the itinerary yet — I’m just collecting possibilities.
If it’s my first time visiting somewhere, I do like to start with the obvious sights. I know some people are very anti “tourist must-dos,” but I’m really a tourist after all. If I’m going to Paris for the first time, I probably do want to see the Eiffel Tower. If I’m going to Rio de Janeiro, I probably do want to go up to Christ the Redeemer. For me, there’s usually a reason these places are famous (and I never regret doing them).
For that first layer of research, I usually look at:
5–10 travel blogs
Google / AI search summaries for a quick overview
official tourism sites
a few “best things to do” lists
I don’t treat any single source as the final answer. It’s more that after browsing a few different resources, the same places start showing up again and again. This is especially useful for places I’m not as familiar with. It gives me a quick sense of the major sights, but also sometimes surfaces things I would not have thought to search for on my own.
After I get that basic tourist layer, I start looking for things that are more specific to me.
That might mean something tied to the place, like where to eat escargot in Paris, or something tied to how I like to travel, like where to go running in Santiago. It could also be a specific kind of neighborhood, a market, a walk, a bookstore, or anything that appeals to me beyond the big tourist items.
For those more specific searches, I usually check:
Reddit threads
smaller local blogs
city-specific websites
niche Google searches
posts from people who seem to know the place well
Reddit can be especially helpful for questions that are a little too specific for a generic itinerary post, though I still take everything with a grain of salt. I also like looking for blogs focused on that specific city or region, because they tend to go deeper than general travel sites.
At the end of this step, I put everything that appeals to me into one document. It doesn’t have to be organized yet. I just want all the possibilities in one place so I can start seeing what I’m working with.
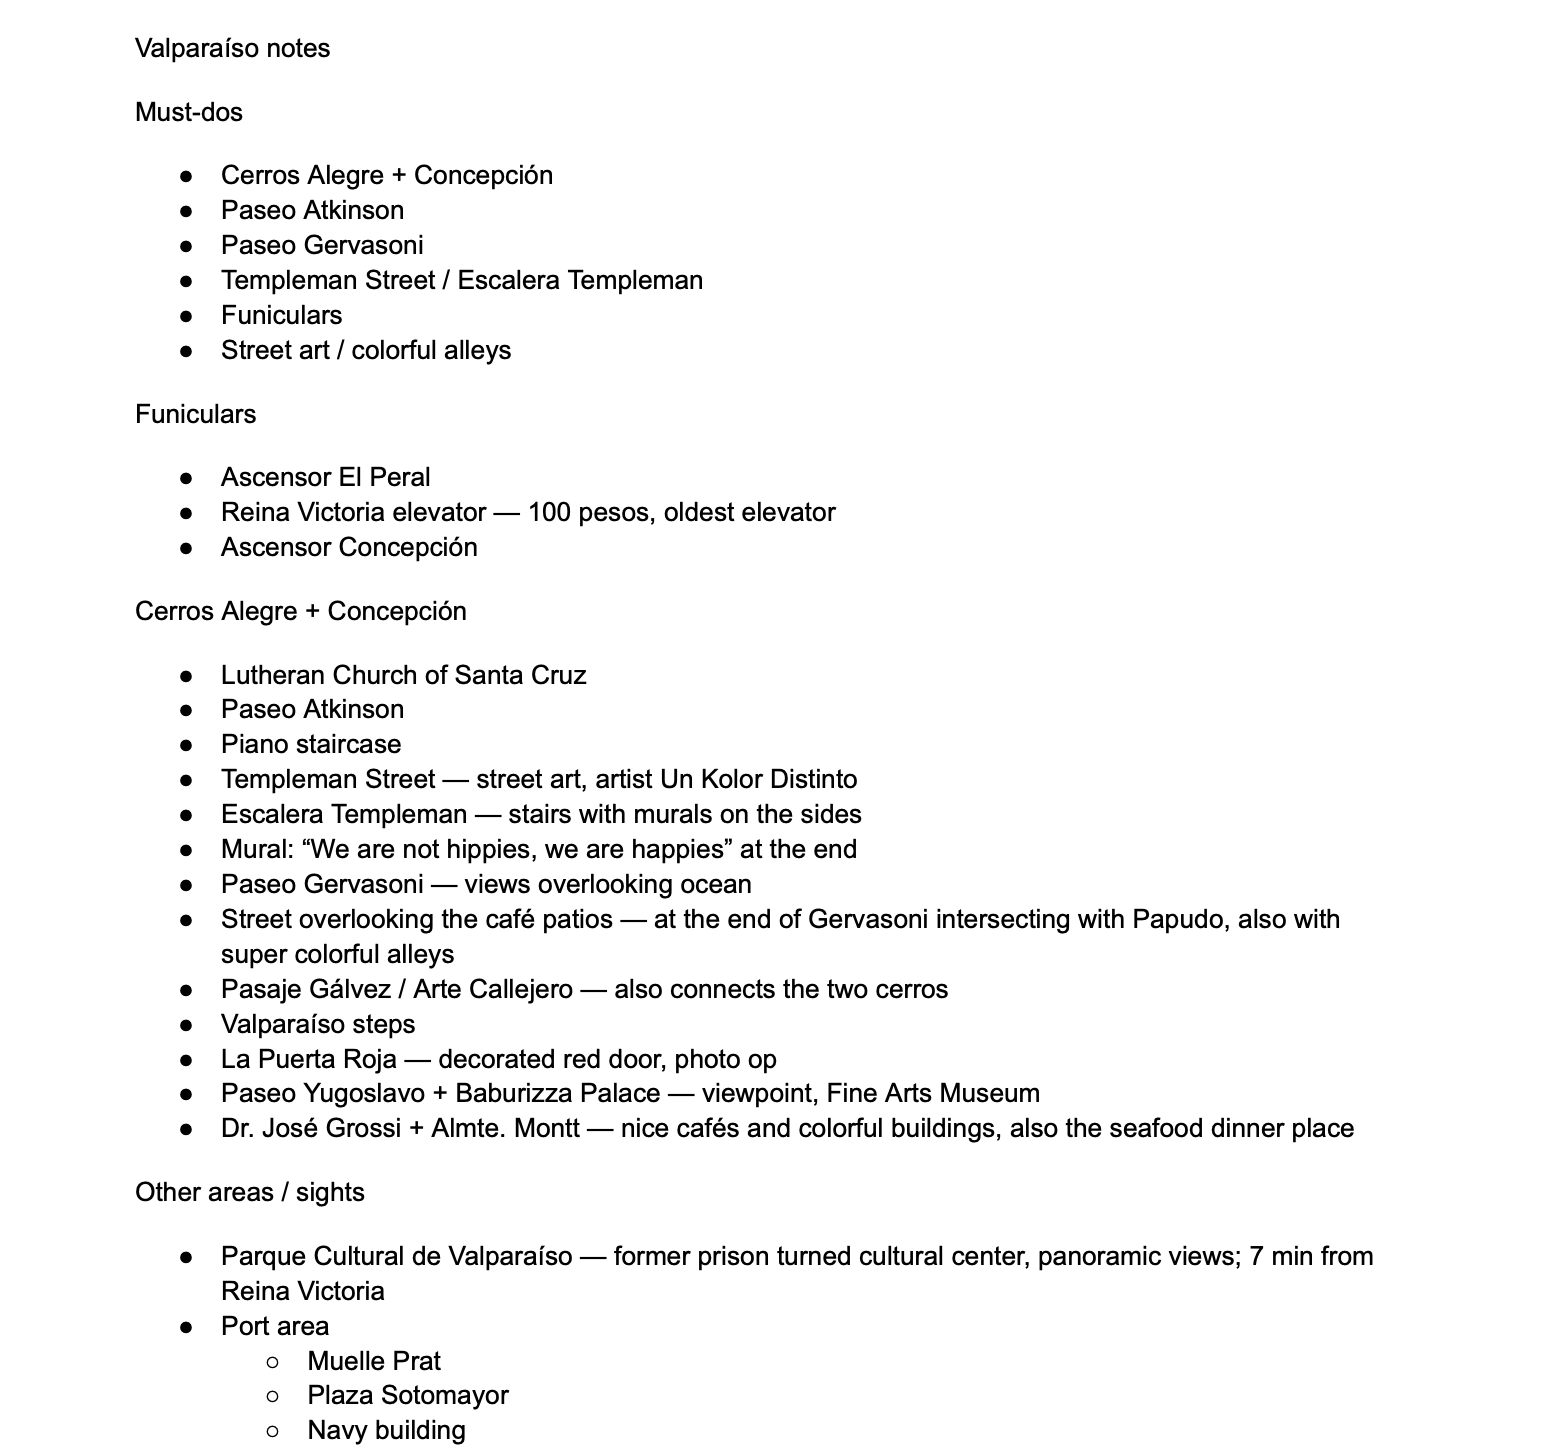
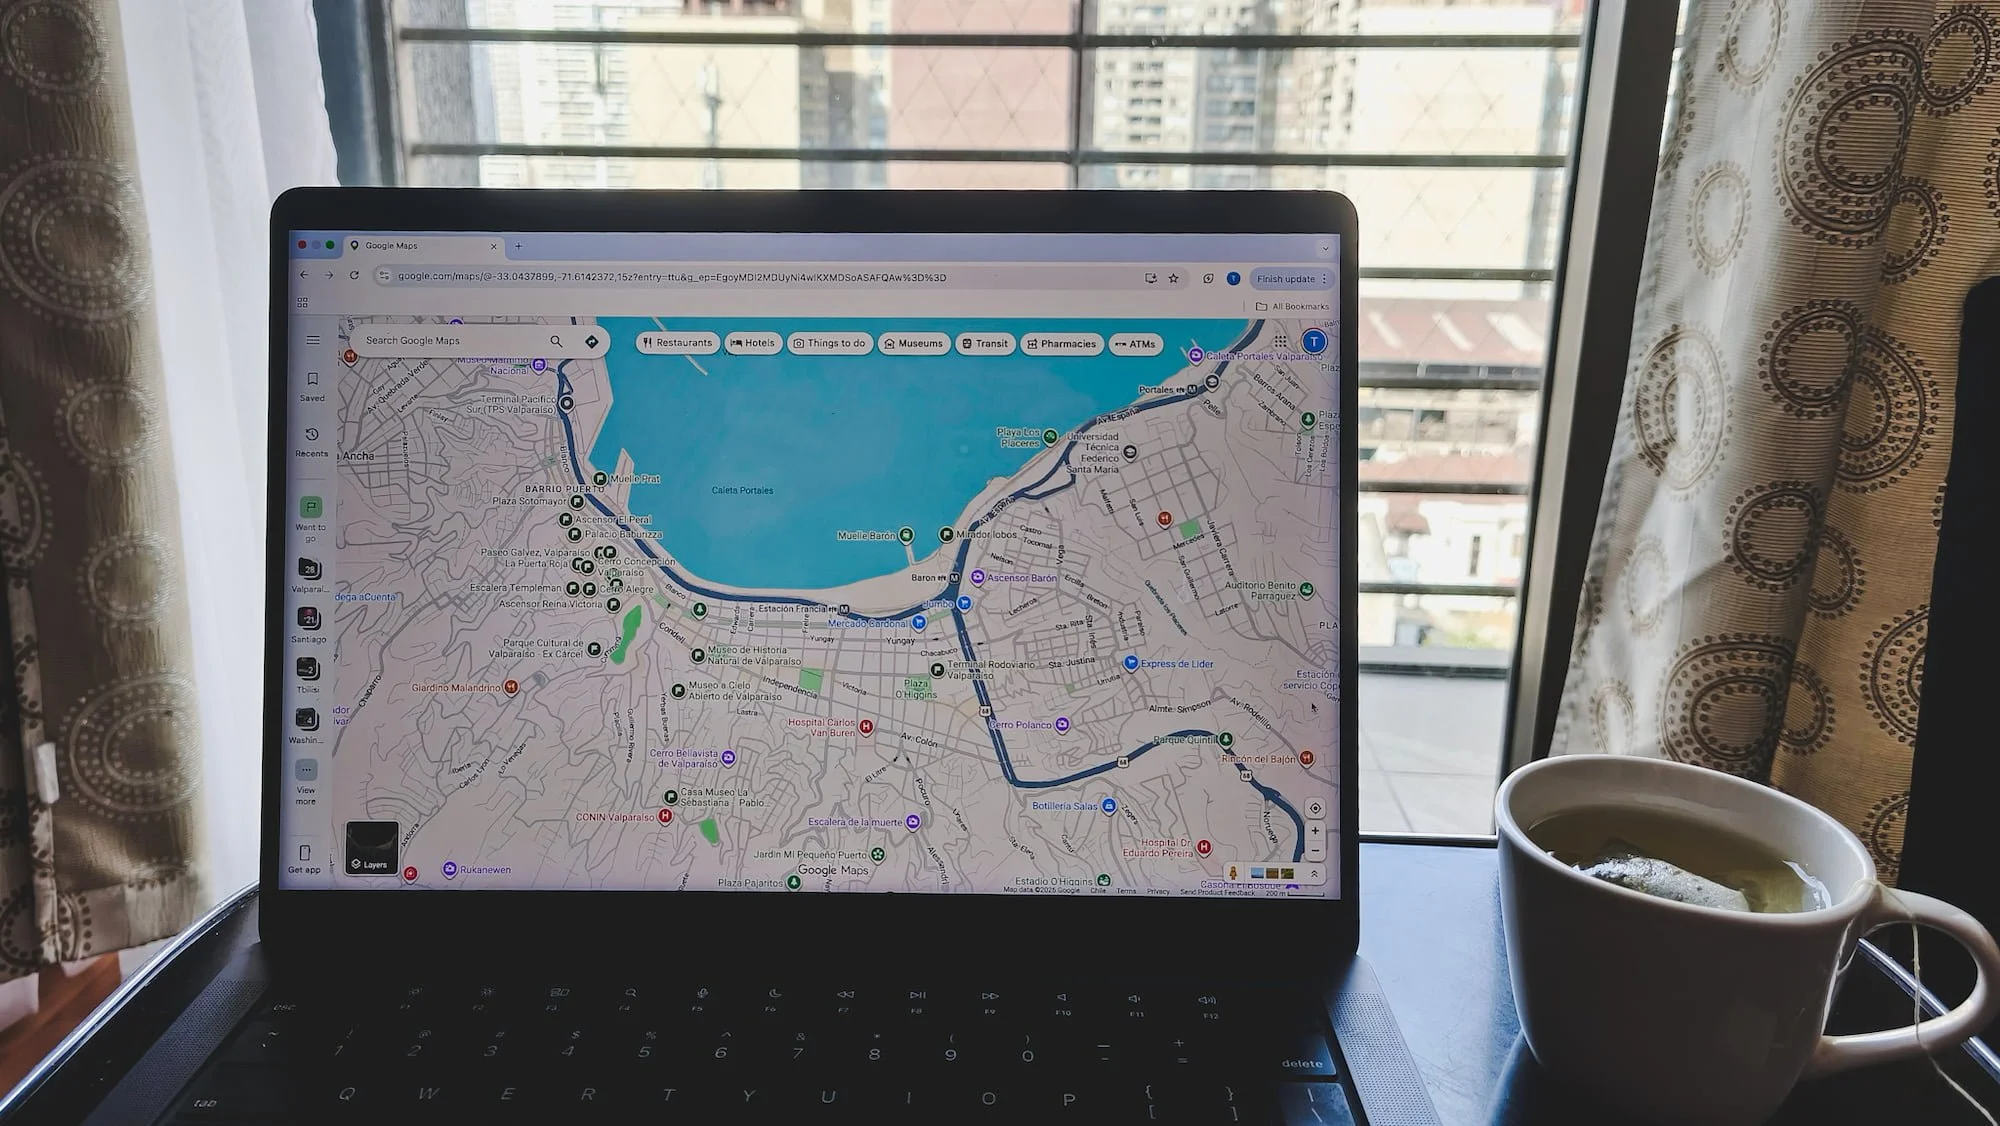
Here’s an example doc I used when planning my day trip itinerary to Valparaíso, Chile. I started by collecting possibilities without worrying about route order or schedules yet.
2. Put everything on a map
Once I have a messy wishlist, I put everything into Google Maps to build a mental map of the destination.
This step is crucial for me because (as a visual person) a destination doesn’t really click in my head until I can see where things are. A list of things to do can sound manageable on paper, but mapping everything gives me a much better sense of distance and how the city actually fits together. A lot of articles will mention the neighborhood or area where something is located, but that usually doesn’t mean much when I’m planning for a city I don’t know well yet.
Once I actually see everything on a map, I can start figuring out:
which places are close together
which sights are farther out and need more planning
where the main clusters are
what might be easy to combine
what might take too much effort for the time I have
For example, for a smaller base like Valdivia, Chile, the layout might be obvious pretty quickly, since most sights are located in distinct areas: the town center, the river, the island across the river, and the coast. That’s one reason my 4-day Valdivia itinerary naturally ended up organized by area. But for a bigger or denser city, I usually need the map before the place starts to make sense.
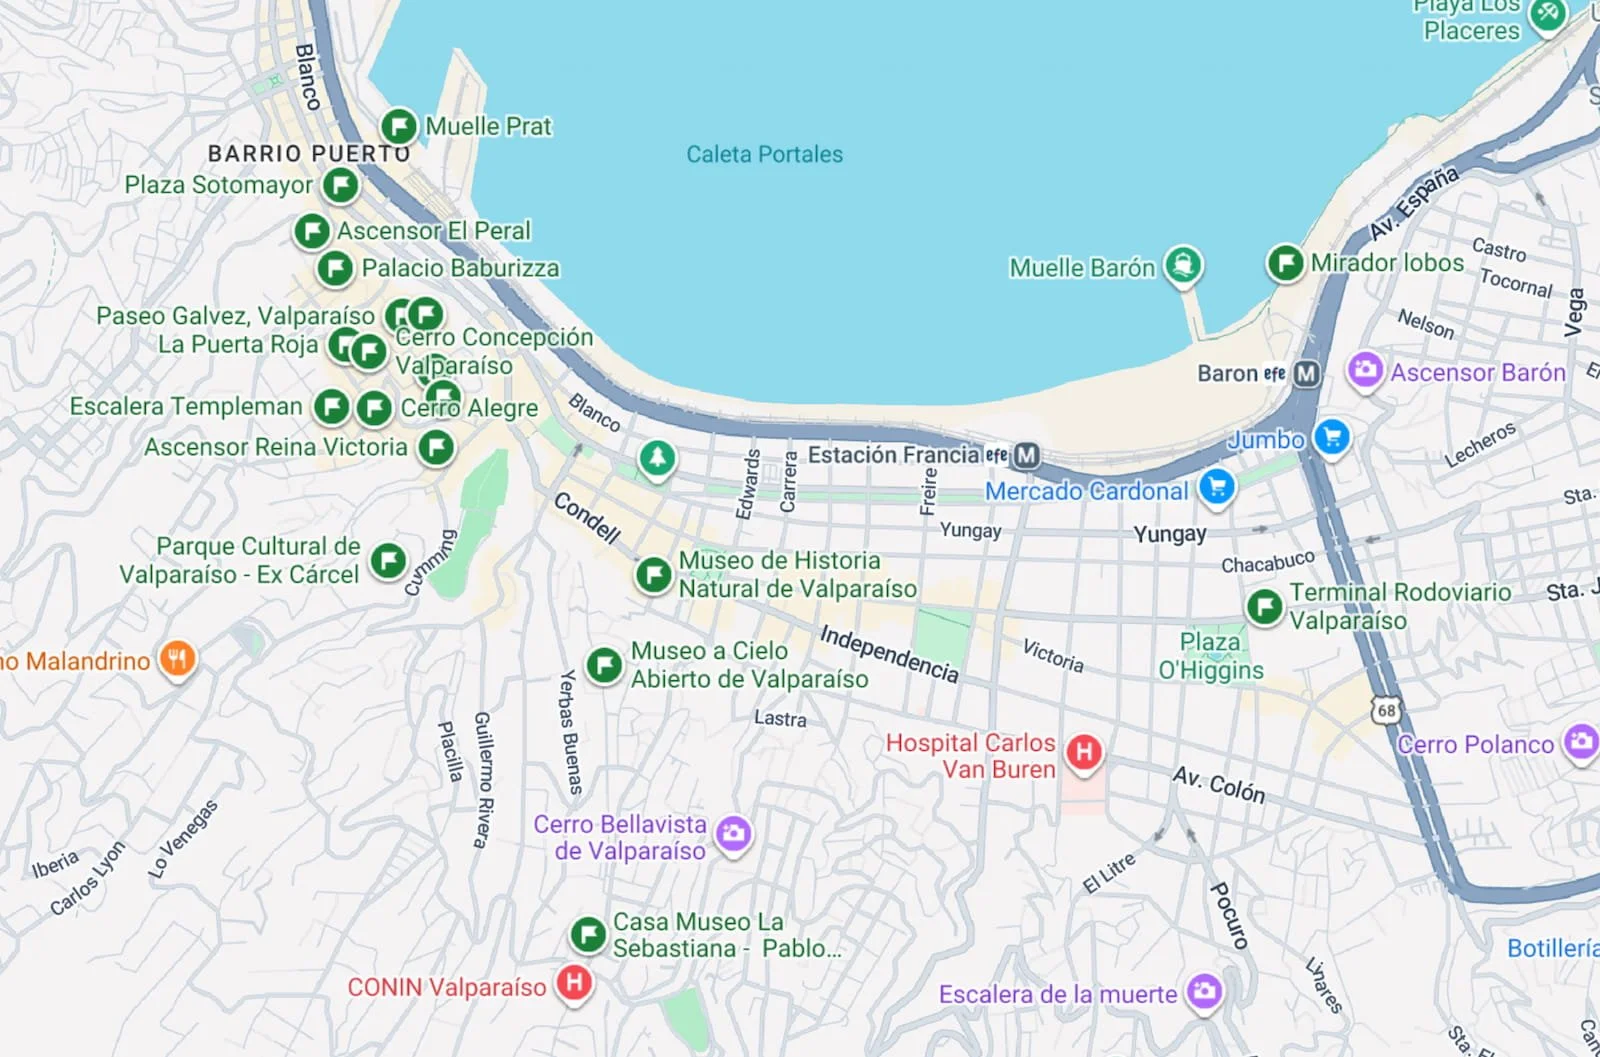
I then put the places in my Valparaíso wishlist on Google maps, marking them in a list. Once I did this, the layout of the city started to make a lot more sense. (Map data © Google)
3. Find the natural geographic clusters
After everything is on the map, I start grouping my wishlist into rough geographic areas. I’m not building the exact route or day-by-day itinerary yet, but I am starting to see which places naturally cluster together and which ones could realistically become a full day, half-day, or smaller stop within a larger route. This is the step where the itinerary starts to become lower-friction.
The main goal of grouping things this way is to cut down on transit time and avoid moving back and forth across the city. I’d usually much rather spend that energy walking through an interesting neighborhood, sitting down for a good meal, or having more time at the place I actually came to see.
These groups might look like:
historic center
waterfront / river area
museum district
one specific neighborhood
farther-out sights
day trip options
restaurants or cafés near each cluster
While I’m doing this, I also check the distance between major points. For example, if I’m interested in the Musée d’Orsay and the Eiffel Tower in Paris, I’ll look at how far apart they are by walking and transit. Maybe they make sense in the same geographic cluster, or maybe they don’t.
At this stage, I’m not deciding exactly what each day will look like yet. I’m just getting a realistic sense of what belongs together, so building the actual itinerary later is much easier.
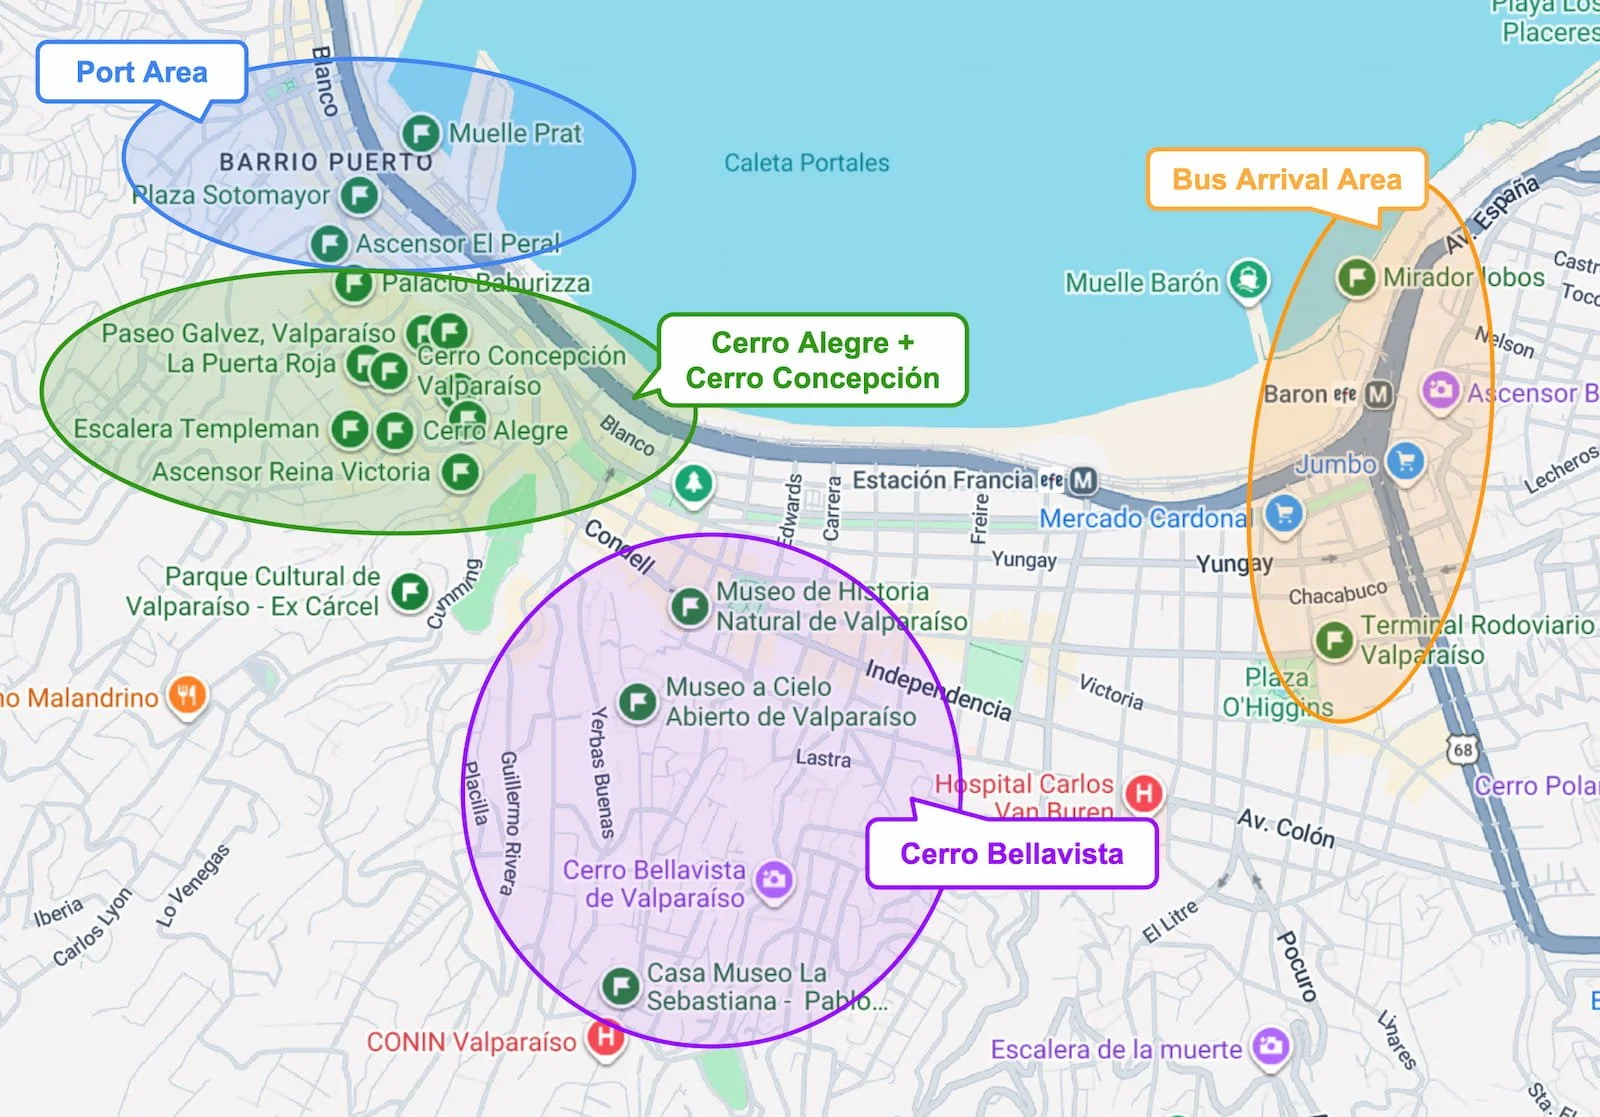
In Valparaíso, the main clusters started to show up around the port, Cerro Alegre + Cerro Concepción, the bus arrival area, and Cerro Bellavista. (Map data © Google)
4. Check the friction points
Once I have places grouped by area, I start checking the basic logistics. For me at least, this is the less exciting part of itinerary planning, but it saves a lot of annoyance later — I’ve definitely skipped this step in the past and then shown up somewhere only to realize it was closed or sold out. Not ideal 🙃.
I usually go to the official site first, and sometimes the place’s social media if the official site seems outdated. The main things I check are:
opening hours
closed days
ticket requirements
whether reservations are needed
whether tickets sell out in advance
how long to spend there
best time of day to visit
whether the place is actually worth the effort
This step matters especially for popular sights, restaurants with limited hours, or anything that requires timed entry, and it matters even more for places where tickets can sell out in advance. La Sagrada Familia in Barcelona is a good example — it not only requires timed entry, but the tickets could sell out days before. It’s definitely to better know that before I go than scrambling to book tickets at non-ideal times or worse, not be able to go at all.
This is also where timing starts to shape the itinerary. If one place opens early and another is better later in the day, that gives me a natural order. If two places only have narrow overlapping hours, I might need to choose one, move one to another day, or decide whether I just drop it for this trip. I also look up best times to visit certain places, such as when it’s less crowded or when for the best view. Sometimes it’s just obvious because it’s a meal or something that only makes sense at a certain hour.
Overall for me, this step is not about making the itinerary rigid. It’s about spotting the parts of the day that actually have constraints so I can make sure I do those things. If I know the museum closes at 5, the viewpoint is better around sunset, and the restaurant only opens for dinner, I can build around those things instead of finding out too late.
5. Build loose day blocks
After I have the wishlist, map, area clusters, and basic logistics, I start building the itinerary day by day.
A lot of the time, the geographic clusters from the previous step naturally become the structure of the trip. In Lima, for example, it made sense to spend one day around the historic center and another around Barranco instead of moving between different parts of the city. If I only have one day somewhere, I might split the day into two broad areas, like one neighborhood or cluster in the morning and another in the afternoon.
But geography is not always the whole answer. Sometimes several things I want to do are technically in the same general area, but that does not mean they all fit into the same day. They might take too long, require timed tickets, be better at different times of day, or just be too much energy all at once.
So at this stage, I start turning those rough clusters into actual day blocks. Sometimes I organize a day by:
geography, if the places naturally fit together
theme, like the Gaudí-focused second day in my Barcelona 2-day itinerary
energy level, so I’m not putting every high-effort activity into the same day
excitement level, so I do the thing I care about most when I have the most energy
timing, if certain places have limited hours or timed entry
weather, especially if heat, rain, or wind could change how the day feels
This is also when I start thinking about the rough order of the day. For example, if Park Güell is better in the morning for fewer crowds and Sagrada Familia has timed entry in the afternoon, that gives the day a natural structure. If a neighborhood is better for nighttime energy, maybe it makes sense to end there. And if sights in one area already string into with a natural flow with no constraints, then that’s my day. I still don’t need a detailed schedule at this point (that’s the next step), but I just want each day to have a basic shape.
6. Turn each day into a timed route
Once I have the rough day blocks, I finally turn each day into an actual hour-by-hour route. Constructing this for me is crucial because by doing so, I know I’m connecting the places I want to see in a way that makes sense. Once I’m there, I don’t have to keep making decisions from scratch. I have something I can trust and follow. It’s especially valuable even I’m short on time, like a layover in Panama City or trying to see Santiago in one day.
To construct the route, I use Google maps a lot — I put the day’s stops into the map and play around with the order to see what makes the most sense. Sometimes the route is obvious because the sights naturally line up. Other times, factors like opening hours, meal plans, transit, or geography like hills might force me to form a loop or backtrack a little.
The main things I’m checking are:
what order makes the most sense geographically and logistically
whether I can minimize backtracking
whether walking or transit makes more sense
whether the route is pleasant or just technically efficient
where I might want breaks
what I can cut if the day gets too full
I want to note that even though I’m trying to route things efficiently, I’m not only looking for the fastest route. I’m also looking for the route I’d actually want to take. If walking along a river is a little slower than walking beside a busy road, I’ll probably choose the river. And if two places are a bit farther from each other but the walk takes me through an interesting neighborhood, I might choose to walk instead of taking transit just to save time.
I also want to note that though having a route gives me a plan I can trust, it doesn’t mean I have to follow it perfectly. My day trip to Valparaíso, Chile that I’m illustrating in the visuals was a good example. The main part of that itinerary was clustered around Cerro Alegre and Cerro Concepción, hills that have winding streets, staircases, little turns, and sometimes closed streets that force detours. It took me a while to map out a route ahead of time, but that meant I could connect the main places I wanted to see without feeling like I was constantly missing things or doubling back.
But because the area is dense, the route was more of a base than a strict plan. If I had extra time, I could wander. If I got tired, I could cut something. If I saw a staircase or mural that looked interesting, I could follow it without feeling completely disoriented.
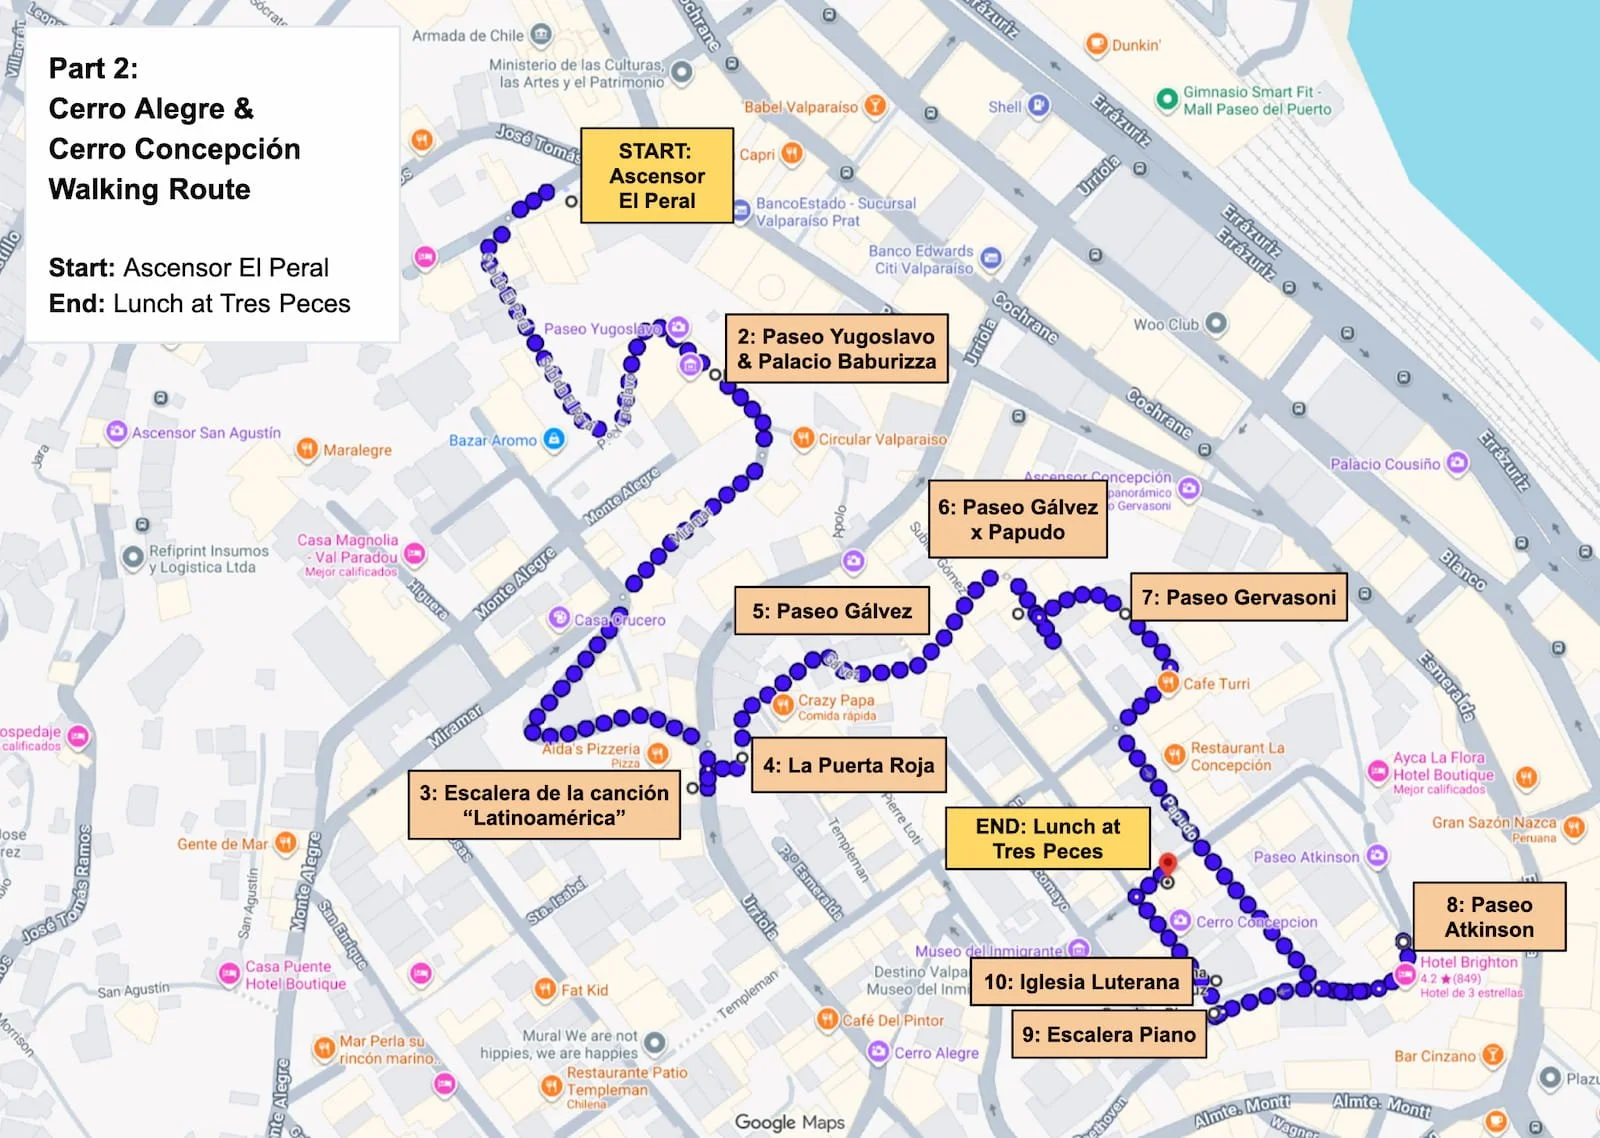
This is just the Cerro Alegre + Cerro Concepción part of my Valparaíso route, where I connected the densest cluster of stops into a flexible walking loop.
The point is not to plan every minute
For me, a low-friction itinerary is not about making travel feel overly controlled. It’s to know that I’m giving myself a good chance to see the things I’m actually interested in, without having to figure everything out while I’m already there and distracted by the day itself. And even when things change (like if a place is unexpectedly closed, transit is difficult, or I have less energy than I thought), having a route gives me enough context to adjust without starting from zero.
That’s usually the sweet spot for me: not a rigid schedule, but a plan that helps the day move with a little more flow.
Read more
If you want to keep going, these posts connect naturally to this one:
How I Travel With Less Friction — the broader travel approach behind this process, including planning, packing, movement, and reducing the day-to-day friction of a trip
Santiago in 1 Day — an example of a tighter itinerary built to see a lot in limited time, while still leaving room to adjust along the way
My One-Bag (30L) Packing List — the packing side of low-friction travel, including the clothing, gear, and systems I use to move through places more easily
Thanks for reading — happy planning!
Have a question about this?
Shoot me a message or leave a comment below — I read everything, and I’m always happy to help if I can!

